For members, project ideas include Vegetables, Fruits, Flowers, Leaves, Animals, Birds, Eatables like Pizza, Burger, Salad, Fries.

Sunday 26 May 2013

Alligator flat hair clip

HC130526A
Alligator flat hair clip..for sales....
Price: 20 sen/pc
To ORDER click link below
http://claystationyongorderform.blogspot.com/

Photo: HC130526A
Alligator flat hair clip..for sales....
Price: 20 sen/pc
To ORDER click link below
http://claystationyongorderform.blogspot.com/

Pearl beads

BD130526A
Pearl beads....4mm diameter.for sales..
Price: 300 pcs=RM15.00
To ORDER click link below
http://claystationyongorderform.blogspot.com/

Photo: BD130526A
Pearl beads....4mm diameter.for sales..
Price: 300 pcs=RM15.00
To ORDER click link below
http://claystationyongorderform.blogspot.com/

Friday 18 March 2011

Polymer Clay Cupcake Charm

Ingredients:
Cake:
3/8" (1.6 cm) ball burnt umber
Frosting:
1/8" (3.2 mm) ball cadmium red clay
1/4" (6.4 mm) ball white clay
Cherry:
1/16" (1.6 mm) ball cadmium red clay
Supplies:
Needle or stippling tool
Headpin


1. Start with the cake part. Roll the ball of brown clay into a small cylinder.


1a. Then set the cylinder on end and gently press to flatten the bottom and top.

2. Use a needle or stippling tool to make tiny indentations all over the surface. Don’t forget the bottom!


3. Thoroughly mix the larger ball of red and the white clays to create an even pink color. Flatten the pink ball into an uneven pancake about twice the diameter of the top of your cake cylinder. The edge of the pancake should be a bit thinner than the middle.


4. Center the frosting on top of the cake, then gently fold down the edges of the frosting onto the cylinder.


5. Press the edge of a safety pin into the side of the cupcake to create parallel, evenly spaced lines all around.


6. Push the headpin through the center of your cupcake until the head is flush with the bottom.

 7. Roll the remaining red clay into a very smooth ball. Slide the cherry onto the headpin and down until it rests on top. Bake for 10 minits 100c.
To Make a Cupcake Charm
1. Finish the headpin in the cupcake into a closed, wrapped loop.
2. Add the charm to a cell phone lariat.

Supplies Needed:
50gram block polymer clay- white
1 round toothpick
1- 8" & 1- 10" length of ribbon
1- 11/2" piece of craft wire

Step #1Make your pieces into the shapes shown. For the BODY roll a 1 1/4" ball of white into a cylinder. For the LEGS roll two 5/8" balls into smaller cylinders. (Each cylinder makes two legs.) For the HEAD roll a 3/4" ball and taper the top into a teardrop shape as shown. The EARS are two 1/2" balls flattened to 1/4" thick teardrops. The TAIL is made from a 1/4" ball made into a teardrop. The tuft of HAIR is made from a 3/8" ball flattened to 1/4" thickness and shaped into an oval.
Step #2Press one small cylinder leg onto body as shown. Use the toothpick to indent a center line to divide front legs. Now make a line to indent the hooves. Follow the same instructions for the back legs.
Step #3With the small end up, attach the head to the front of the body with a 1/2" piece of toothpick. Press an ear on each side of the head with the small ends up. Press the oval on top of the  head, covering the ends of the ears. Press two small seed beads on to the   face for eyes, (You can also make your eyes with a marker AFTER the lamb is baked) Use the toothpick to make lines for the nose and mouth as shown. For pink cheeks, you can rub on a small bit of powdered blush with a cotton swab. Press the tail on the back of the body. Now use the toothpick to make the fleecy wool by making little swirls or circle patterns on the body. Twist the piece of craft wire into a hanger and press in the top of the head.  Bake the sculpture in a foil lined baking pan in a  regular or toaster oven at 100c for 10 minutes.

To make a rabbit just like this one..


To make a rabbit just like this one, you will need white, blue, pink and green polymer clay.
Make all pieces before putting rabbit together. Be sure the arms are equal size, legs, etc. Colored clay will color your hands, so make all of the white pieces first.
The drawing is shown near actual size to help you form the parts correctly.
Put cheeks and nose on the head. Attach the head to the body with a 1/2" long piece of toothpick. Next take a ball point pen in closed position and poke 2 holes in the bottom of the body about 1/4" deep for the legs. Pinch the top of the pants legs to a small point, so they will fit into the holes made in the body. Connect them firmly into the body. Next, poke 2 holes in the upper sides of the body for the arms. Push the arms snuggly into the holes and let arms rest against the body.
Use a toothpick to make indentions in the paws. Press bow tie on at neck, carefully, but firm enough that it won't fall off after baking.
Now poke 2 holes in top of head for ears. We have one ear up and one down, but you may place them both up or both down if you want. Attatch ears now.
Attach feet to legs by inserting a whole toothpick up into each leg, leaving about a 1/4" out to put into the feet. The toothpick will help to strengthen the legs. Don't forget his cotton tail. Use a toothpick to fluff it up and attach it to back of body with a small piece of toothpick.
Check all your parts to be sure he is ready to bake. Follow directions from Basic Instruction page, and don't forget to prop him up while baking.
When Pete is baked and cooled, you can take a toothpick dipped in Black Acrylic paint and dot his eyes.

Beginner Button Class

Additional Tool 
    • 1. Something to cut with - cutter.
    • 2.A work surface - a tile or glass
    • 3.A medium size metal knitting needle
    • 4.A regular oven


Button Hole Position
 
Directions
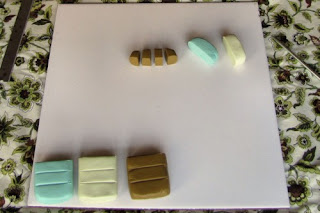
  • 50 gram blocks that are scored into four sections. Using your clay blade, and being careful to point the very sharp edge down, cut one of the sections off of each block, and set aside the remaining pieces.
  • Cut each of these three ¼ blocks into four smaller pieces. You should now have twelve pieces.
  • When you condition polymer, you warm it and knead it well between your fingers.  Pick up one of your small sections and smoosh it between your fingers. Press it from all angles.  Roll it between your palms into a snake.  Ball it up and roll it into a smooth sphere.  Continue to play with it in this manner until it feels comfortable to work with.
  •  
  • When your clay is conditioned and ready to use, roll it briskly around the perimeters of your palms until you have a nice, smooth ball.  It may take some practice to get it perfectly round, but the beauty of working with a solid color is that you can mush it up and start over as often as you like.
  • Place the ball on your work surface and press down with your thumb, flattening the ball to about 1/4 inch thick.  I like for my buttons to be as free of fingerprints as possible.  If you also feel this way, you can gently rub the top of the button with your thumb, and ease the thumbprint off.  This is fairly easy to do on a solid color button, but becomes more difficult when you begin working with patterns.  You’ll need to develop a very soft, gentle touch.
Use the knitting needle to poke two holes in the middle of the button.  Be careful to space your holes in such a way that they are far enough from the edge and far enough from each other not to leave too, too thin of a wall around them.  The less clay surrounding the holes, the more susceptible to breakage your button will be.  Try to avoid any weak points, if possible.
To make sure that the holes go all the way through from front to back, pick up your button from the work surface and re-poke the holes, this time from the back of the button.
Press your scraps together in your hand until they form a short log.  Grasp the log at each end, and turn your hands in opposite directions, in order to twist the log and form thick stripes. Roll between your palms to smooth the edges.


Place the striped snake on your work surface and roll it back and forth to smooth and elongate it. Use both palms, one at each end, gently guiding the snake towards the edges of your work surface, but in opposite directions – the movement will lengthen the snake, and at the same time, tighten the striping.
Trim the messy ends off of the snake, and begin coiling the snake.

 
Continue coiling until you reach the end of the snake, and you should have a large striped snail shell.
Use the brayer to flatten the shell into a 1/4-inch slab.


Place a sheet of plastic wrap on top of the slab, and use your cutters to cut out as many buttons as you possibly can.
Poke holes in the buttons, and set the buttons aside on your baking tray.
You now have a new pile of scrap clay, made up of the remaining slab, and the two messy ends that you cut off of the snake.  Take all of these scraps and repeat the process: form thick snake, twist into stripes, roll out thin & long, coil it, flatten into slab.
Again, cover the slab with plastic wrap and cut out some more buttons.  These will be similar to the first, but the striping on them is likely to be somewhat tighter, and you will begin seeing more secondary colors as the original clays combine with each other.
You will have more clay leftover after this pass.  Continue to repeat the process, until you are left with an amount of scrap that feels too small to turn into a slab.  At this point, skip the slabbing step, and simply turn the whole snake into a single striped snail shell focal button.

Figurine

Figurine

Bear & Dog

Bear & Dog

Earing

Earing

Fruits & Vegetables

Fruits & Vegetables

Polymer Clay

Polymer clay, modeling clay, oven bake clay


Polymer clay hardens by curing at temperatures created in a typical home oven (generally at 265 to 275 °F (129 to 135 °C), for 15 minutes per 1/4" (6 mm) of thickness), and does not shrink or change texture during the process. Polymer clay is sold in craft, hobby, and art stores, and is used by artists, hobbyists, and children. Few tools are essential for use with polymer clay, and these can often be found around the house. A pasta machine is often used to create evenly flat sheets, to mix colors, to condition the clay, and to create patterned sheets.The clay gun, or "extruder", as it is also called, works like a cookie press.You can find these products from us.Polymer clay is available in many colors. Special-effect colors such as ,containing "metallics," and "stone" colors are also available. Clays can be mixed together to create new colors, gradient blends, or other effects. With a technique to use the pasta machine to create a gradient blended sheet of color. Polymer clay can be colored with other media. Paint, ink, colored pencil, chalk, metallic (mica-containing) powder, metallic leaf and foil, glitter, and embossing powder can be applied to the surface. The same materials also can be mixed in as inclusions; this is often done with translucent clay. When acrylic paint is cured onto the surface, it forms a permanent bond with the surface. After it has cured, the clay surface can be left as it is, it can be sanded and buffed, or it can be finished with a varnish. Uses and Techniques


Sculpting. Hand-shaped items can be any size from "miniatures" to quite large. can also be created; clay clothing and accessories can be made for sculpted figures.


Creating beads and jewelry of all kinds, such as pendants, earrings, barrettes, and buttons.


Forming "canes," which are logs of clay with patterns running through their entire length, from which identical slices can be cut and used in various ways. The patterns created in canes can be simple, complex, or anything in between; they may be pictorial or simply geometric. Canes (and therefore their images) can be "reduced" so that they become quite small, and then combined to make multiple images.


"Cover"ing items made from materials such as glass, metal, cardboard, terra cotta, and some plastics. Some popular items for covering are pens, eggshells, votive candle-holders, and switch-plates. Larger items, such as tables, can also be veneered.


Creating vessels large and small. Jars, boxes, bowls, and container pendants can be created freestanding, over , or over removable armatures.


Impressing textures, lines or images into raw clay with rubber stamps, texture sheets, sandpaper, needle tools, or other items.


Making with hardened clay, then pressing raw clay into the molds to create casts and to duplicate textures, shapes, whole faces. Molds made from metal, glass, and silicone can be used with clay as well.


Using polyclay to accept "transfers" of black-and-white or color images from photographs, drawings, computer-created images or text. Images can be transferred onto freestanding liquid clay films or decals.


Creating simulations or of many natural materials such as ivory, jade, turquoise, wood, granite, metal, leather, , or .


Carving or drilling polyclay after it has been cured (and backfilled, if desired).


Inlaying tiles or chips to create a clay or other materials to create collages. A "clay gun" can be used to uniform rope shapes.


Creating with polymer pastes, and bas reliefs.


Creating practical utility items, such as frames, games and game pieces, dioramas, toys, mini-books, notebook covers, greeting cards, and postcards.


Shaving off thin slices from layered but distorted stacks of clays, powders, and inks.


Using clay together with other media, such as wire, paper, beads, charms, stamps, and fabric.


Skinner Blend: Gradient color blending technique for two or more colors 1] using triangles of clay and a pasta machine.